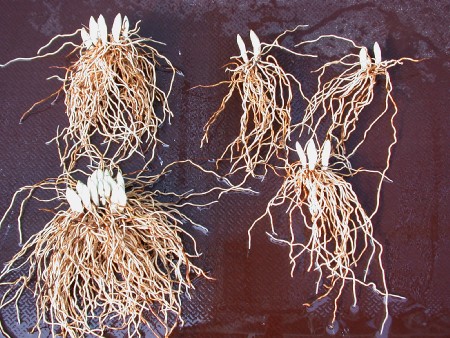
How to divide Cypripedium hybrids
I have learned that many garden lovers are quite reluctant when it comes to dividing a big, established Cypripedium clump. This is risky because the oldest parts in the middle will eventually die and the following rot may spread over the whole plant and kill it.
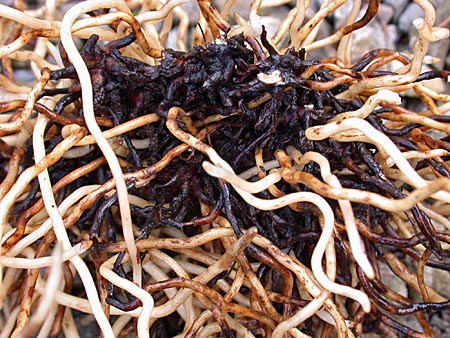
I hope that these instructions will give you a good insight into how I work with all of my garden orchids every few years in order to keep them growing well. In this way you can achieve more than hundred flowering shoots within less than ten years (see this example). And your neighbour might be happy about a division, too!
You can also watch a video about this topic.
The best time for dividing is autumn (September, October), shortly after the shoots have died back.
Step 1: Get the clump out of the ground and remove most of the soil by using cold tap water.
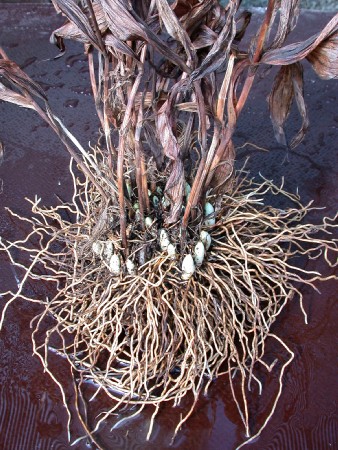
Step 2: Remove all dead shoots. The easiest way is to pull sideways, not upwards! Don't cut the shoots off, the remaining tissue may rot and cause problems. Don't worry that you might injure the rhizome.
The only exceptions are Cyp. flavum, Cyp. reginae and their hybrids (e.g. Ulla Silkens). The shoots of these plants don't seperate well from the rhizome. Cut them off in this case.
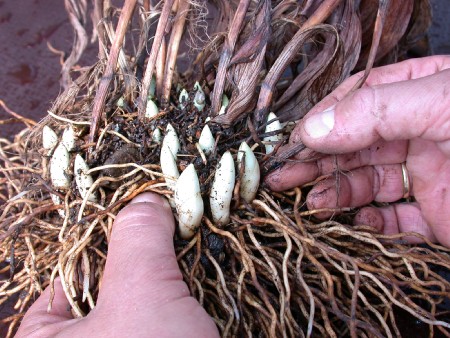
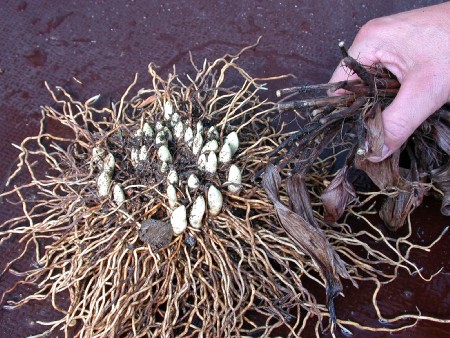
The photo below shows the clump after removing the dead shoots. As you can see the shoots have separated perfectly from the rhizome. All have been pulled off, not cut!
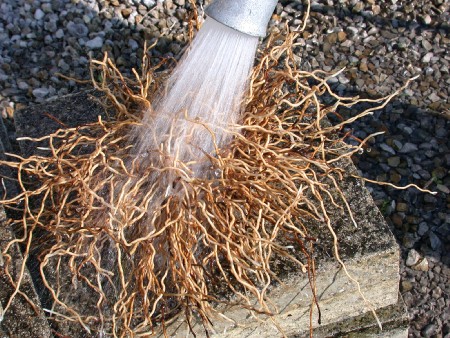
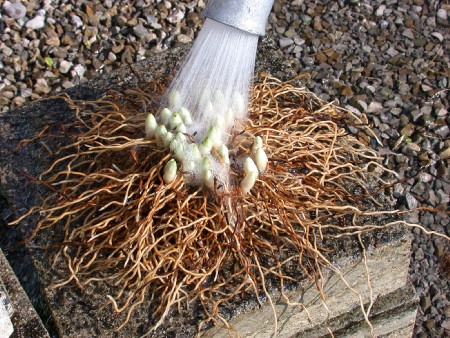
Step 3: Now clean the clump thoroughly with cold tap water. Use a strong flow of water to ensure the complete removal of all soil, especially on the underside of the rhizome. This keeps the risk of rot low and makes it easier to divide the rhizome.
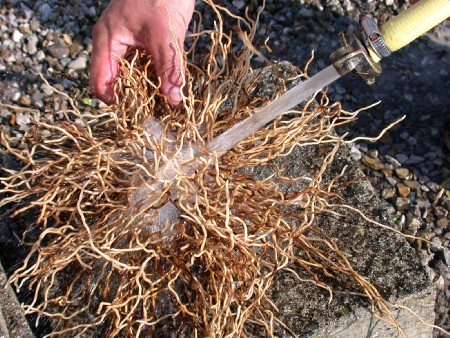
Step 4: Now bend the clump up and down to loosen the net of roots and find a spot in the middle where the rhizome breaks apart (you will hear and feel it). This procedure can require quite an amount of strength, but don't worry, it won't harm the plant.
Only use a knife if the clump is so dense that it is no longer flexible. However, if this is the case then I would say that you have waited too long for dividing. A knife injures the plant tissue and cuts roots, therefore avoid it if you can.
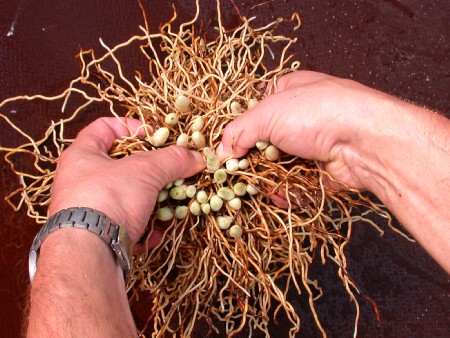
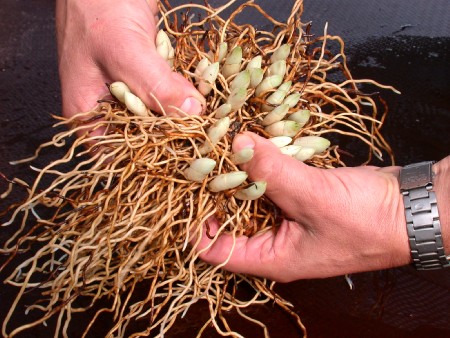
Step 5: Now you can pull the two parts apart. Don't just pull straight, move both hands in various twists and angles so that the roots of the two divisions separate from each other without breaking.
This is the point where the thorough cleaning of the clump (see above) helps a lot. Performing this procedure under running water makes it even easier and less damaging.
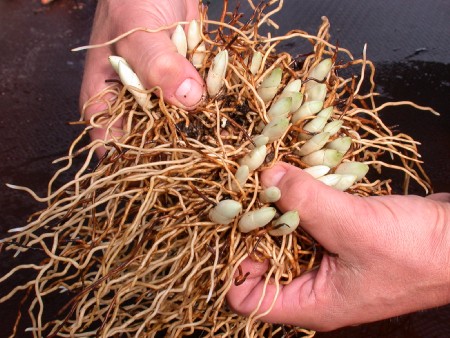
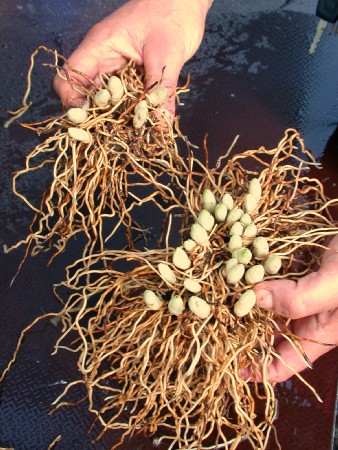
In this way you can divide the clump step by step into several pieces.
Step 6: Remove all broken and dead Cypripedium roots, roots of other plants and any other debris. In this way no rot occurs after replanting.
There is no need for fungicides, activated charcoal or anything like this! Even if the plant is in a bad state, only good culture conditions help the plant to recover, according to my experience. The use of chemicals has never produced convincing results for me.
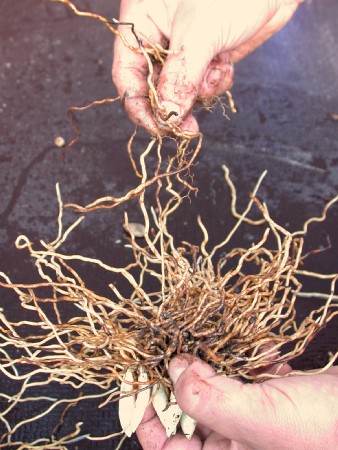
Step 7: Rinse all parts again thoroughly with cold tap water.
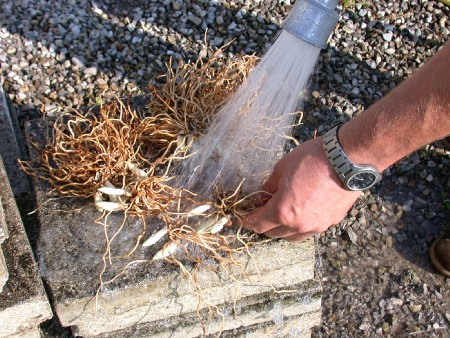
Now they are ready for replanting into the garden. Leave enough space for future growth! The divisions will increase the number of shoots, each year, markedly quicker than before.
